Friday, October 25, 2013

Recycled Party Hat

So, this weekend I have a baby turning one!  I don't know where this last year went, but we are of course having a party.  Hmmm.  A party?  I don't have any party hats.  Well, not except for some Winnie the Pooh Ones that I'm already planning on using for a theme next year (courtesy of a garage sale find), and Princess hats left over from my daughters birthday.  Can't use princess for a boy and not going to use Pooh.  I just want one picture with a hat on his head since it's his first birthday. And I've made all the other decorations, so it doesn't make sense to go shopping for some Dino décor, just for a silly hat.

That's It!  I'll just recycle one of the old princess hats!

Well, there was no way I was going to come up with a cone shape to cover up the old hat.  And I still wanted the shape from the previously purchased hat.  I didn't have time to start something from scratch.  So, I just started ripping pieces of paper (I used three different colors), grabbed a glue stick, and stuck them on.  Then, I cut out my dinosaur and glued it to the front of the hat.  And, there we have it: a quick, inexpensive hat for the birthday boy!


Love It!

Thursday, October 3, 2013

Toilet Paper Roll Cord Keepers

Imagine your decorating for Christmas.  The lights you hang won't quite reach to the nearest outlet.    You head to the box where you store extension cords, only to discover they are all tangled or knotted together.  After a few minutes of untangling them, you finally get it free.  Are you tired of these tangled cords? My mom got tired of this problem a long time ago.  We came up with a solution that became one of my favorite childhood crafts.  Just yesterday, I shared this craft with my daughter for the first time.


What You Need:
-empty toilet paper role, paper towel roll, or other cardboard tube
-crayons, markers, or paint


Instructions:
**Decorate any way you would like and HAVE FUN!


Pssst - Parents beware:  As a kid, I would sell these to my mom for money.
 
Now, fold extension cord in half a couple times (the number of times you can do this depends on how heavy duty your cord is).  Then stick the ends through the toilet paper roll and throw it in a box.  And Ta Da:  They're ORGANIZED!  No more knots!


Love It!


Tuesday, October 1, 2013

New Adventure Creative Card

Is someone you know getting ready to go on a new adventure or start a new chapter in their life?  Maybe they have just graduated college and are ready to step into their dream job.  Maybe someone is moving to a new state or our out on their own for the first time.  Maybe it's a new job after being employed at one place for many, many years.  Whatever the journey may be, why not send them a creative card to support them and let them know your thinking of them.  That's where this idea originated.  A family member of mine has finally landed her dream job and I want her to know how excited we are for her.

So, what image do you think of when consider a journey or heading out on a new path?  For me, it was footprints!  Hmmm, where can I find footprints?  I know!  I know!  My kids.  And let's face it, who doesn't get giddy anytime you see something made from the footprint or handprint of a special child in your life.  There just so cute!  Yep, we decided to make a mess.  We pulled out the finger paint and made footprints onto a card.  

I used stock paper folded in half, hamburger-style.  I put one set of footprints on the outside and one on the inside.  We did bigger footprints (my three-year-old) on the front cover of the card and smaller footprints (11 month old) on the inside.  The thought behind this was that the footprints would appear smaller as they got farther away.    Then we put a little saying with the prints, "Best Wishes On Your New Path."  And don't forget a message along with it and sign your names!  A reminder that God has great plans for them, would be wonderful too, of course!  Oh, and no worries.  If you don't have children around to use for your footprints, use your own!  You just might have to adjust the size of your paper!


Love It!
 

Wednesday, September 4, 2013

Homeade Taco Hamburger Helper

Again, I love the taste of Hamburger Helper, but I don't like to buy it because I don't think boxed stuff like that is very healthy.  So, I developed my own Taco version.  Now, I'm sure I'll will disappoint some of you - I don't have the exact measurements of the ingredients for you.  Why?  Because I follow a pinch of this and a dash of that method of cooking.  I will however, try to give you an idea of amounts.   Also, I will also share with you two versions of the same recipe.

 
This is the cheese sauce version.

To make, you will need:
1 pound of ground beef, browned with desired amount of onion, and then drained. 
Elbow macaroni, cooked and drained.  (I will guess I sue about 2 cups cooked). 
sweet peppers - variety of colors or whatever you have on hand
Ground spices: cilantro, cumin, coriander, cayenne pepper, basil, and chili powder)
hot sauce
cheddar cheese

After the beef is browned and drained, add a few dashes of each spice.  I don't always add cayenne pepper.  It depends how hot I want it and who is eating it.  Then I add a few dashes of hot sauce.

Then, mix the macaroni and peppers in with the meat. Last stir in desired amount of shredded cheddar cheese.  Cover and let melt.

So, what's the other version, you ask?  It a cheesier version:

To make Cheesy Homemade Taco Hamburger Helper:

First, brown beef and onions, drain and add spices as in the first version.  Add macaroni and peppers.

Second, make a white sauce with cheese.  To do this:  Melt one tablespoon butter in a small sauce pan.  Next, add 1 tablespoon four, a dash of salt, and a dash of pepper.  Stir and cook for a minute or so.  The add the milk (not all at once).  Constantly stir until thick and bubbly.  Once it bubbles, stir for 1 to 2 minutes more.  Then add 1 cup of cubed cheese. I use Velveta.  Stir until melted.  Then add a few dashes of hot sauce to the cheese sauce.  Then add the cheese sauce to the browned beef and macaroni.  Yum!  Enjoy!


Love It!


Wednesday, July 24, 2013

Kid's Keepsake Craft Box

It's starting to pile up.  The cute craft projects made by my darling daughter who is three.  The ones I can't bear to throw away.  No, I don't keep every single colored picture or anything like that.  If I did that, my house would be stuffed by the time I am forty.  But there are certain ones I don't want to part with.  The ones that really get me are those that are made with a foot or hand print.    I especially enjoy those that she brings home from daycare, Sunday School, or VBS.  We also love to do crafts together.

I knew I needed to find a place to store these special keepsakes.  Many of them are displayed somewhere in the house, at least for a little while.  But eventually they must come down, to make room for something new.  I finally had an idea.  A craft that we could do together.

I emptied a shoe box. Unfortunately all of them were in use.  Then we gathered some of these "projects for saving" and used decoupage to glue them to the box.  We mainly used her handprint crafts and a simple craft project that she had done at daycare where she decorated her name.  I also traced her hands onto construction paper, cut those out, and put them on the box. 


Brylee loves to "use the scissors" to cut out paper.  She is very good at making confetti.  So, I let her cut paper while I put on her craft items.  When I was done with that, I let her decorate the box with the paper scraps.    Well, actually it was a combined effort!  I also cut out some shapes from some of her "painted" pictures from daycare and put those on, too.  Then we covered the entire box in a coat of decoupage.  It was a very fun mother/daughter project!   We would have painted the box first, but since it was already a nice, lovely orange color, we just broke out the decoupage and got our fingers sticky!!


I'm already saving a couple handprint/footprint pictures that daycare did with my baby boy.  Guess I better go shoe shopping so I can get another box!!!
 
I hope you enjoy making your Keepsake Craft Box with your special kid!
 
Love It!

A Mom Moment

Meal time had become super frustrating, as of late.  A bargaining table.  If you eat this, then you can have this.  Some of the bad habits started because we often just take one food item, eat it and then take the next when we are done with the first.   The consequences were that are three-year old would often eat a lot of what she liked best and little of the other, maybe, healthier food items. 

I'm not sure how it happened, but some how we were needing to find a way to encourage her to eat her food, or to at least try a food.  We would start off saying you need to eat 10 bites and after each bite she ate we would subtract one finger.   Hey - this worked great for helping her learn to count, and especially count backwards.  And then somehow along the way, it turned into her getting a reward for each 10 bites - maybe one chip or one of something else she really liked.  It worked o.k. at first, but eventually she learned how to use the system and do her own bargaining.  She bargained for only five bights and then three.

I eventually couldn't take it anymore.  Something had to change.  I started by correcting some of the bad habits....... and now things are much better, calmer, and more relaxing.

We began putting all food on her plate at the beginning of a meal.  If chips are part of the meal, they go on her plate.  If she wants to eat them first, she can.   In the past we always gave chips last.   It gives her some control back into meal time.  Yet at the same time, Mom and Dad still ultimately have control.  In order for her to get seconds of any of her favorite foods, she first has to clean everything off her plate.  This has helped her eat more of the good foods, and often, now she doesn't want seconds of her favorites (for example a hot dog), because she is already full.  It is working great! 

We also set a timer.  If the timer goes off and her food is not finished, we take it away.  This may seem harsh.  But we offer plenty of time.  We are slow eaters (I didn't used to be, but I've become like my husband).  Meal time is family time.  The reason behind this is that she will learn meal time is for eating, not playing.  She knows the rules.  If she doesn't clean her plate or her plate gets taken away (usually around 45 minutes), then she does not get any snacks or treats.  No food until the next meal time.   I think we have only taken away her food once. 

Most of the time she cleans her plate at every meal.  It has cut down on a lot of the playing at the table.  Often we no longer set the timer, but wait to set it if she is goofing off.  If it gets set, then she knows we are serious.  If she doesn't clean her plate, she is usually clear that she is done.  She knows then she doesn't get a treat - extra's of her favorites (lately this is blueberries!), candy, ice cream, or chips if they are on the table but were not on her plate, etc.  She does not get a treat after every meal, but she knows the eligibility requirements.  The only other rule is that she has to TRY everything on her plate.  Most often the things she doesn't want to try, she likes and eats all gone.

I only hope this works as well on our second child who is currently in the messy baby food stage.  That reminds me - it's time to make more baby food.  I post this only in hope it may give someone else an idea who is struggling through meal time.

Love It!


Thursday, June 20, 2013

Ten Commandment VBS Craft!

I'm making it through VBS week, despite having had strep throat.  Yes, with God all things are possible!!!!  One more day!!

One of the first places I turn for craft ideas for VBS is the internet. 

So, I wanted to share one of the ideas I developed for this year with you.  I hope to help someone who is looking for ideas, like me. 

The story for the first day was Moses and the ten commandments.  Here is the craft we did:


 Mt. Sinai and 10 Commandments Sculpture


Instructions:
 
 
Day 1:

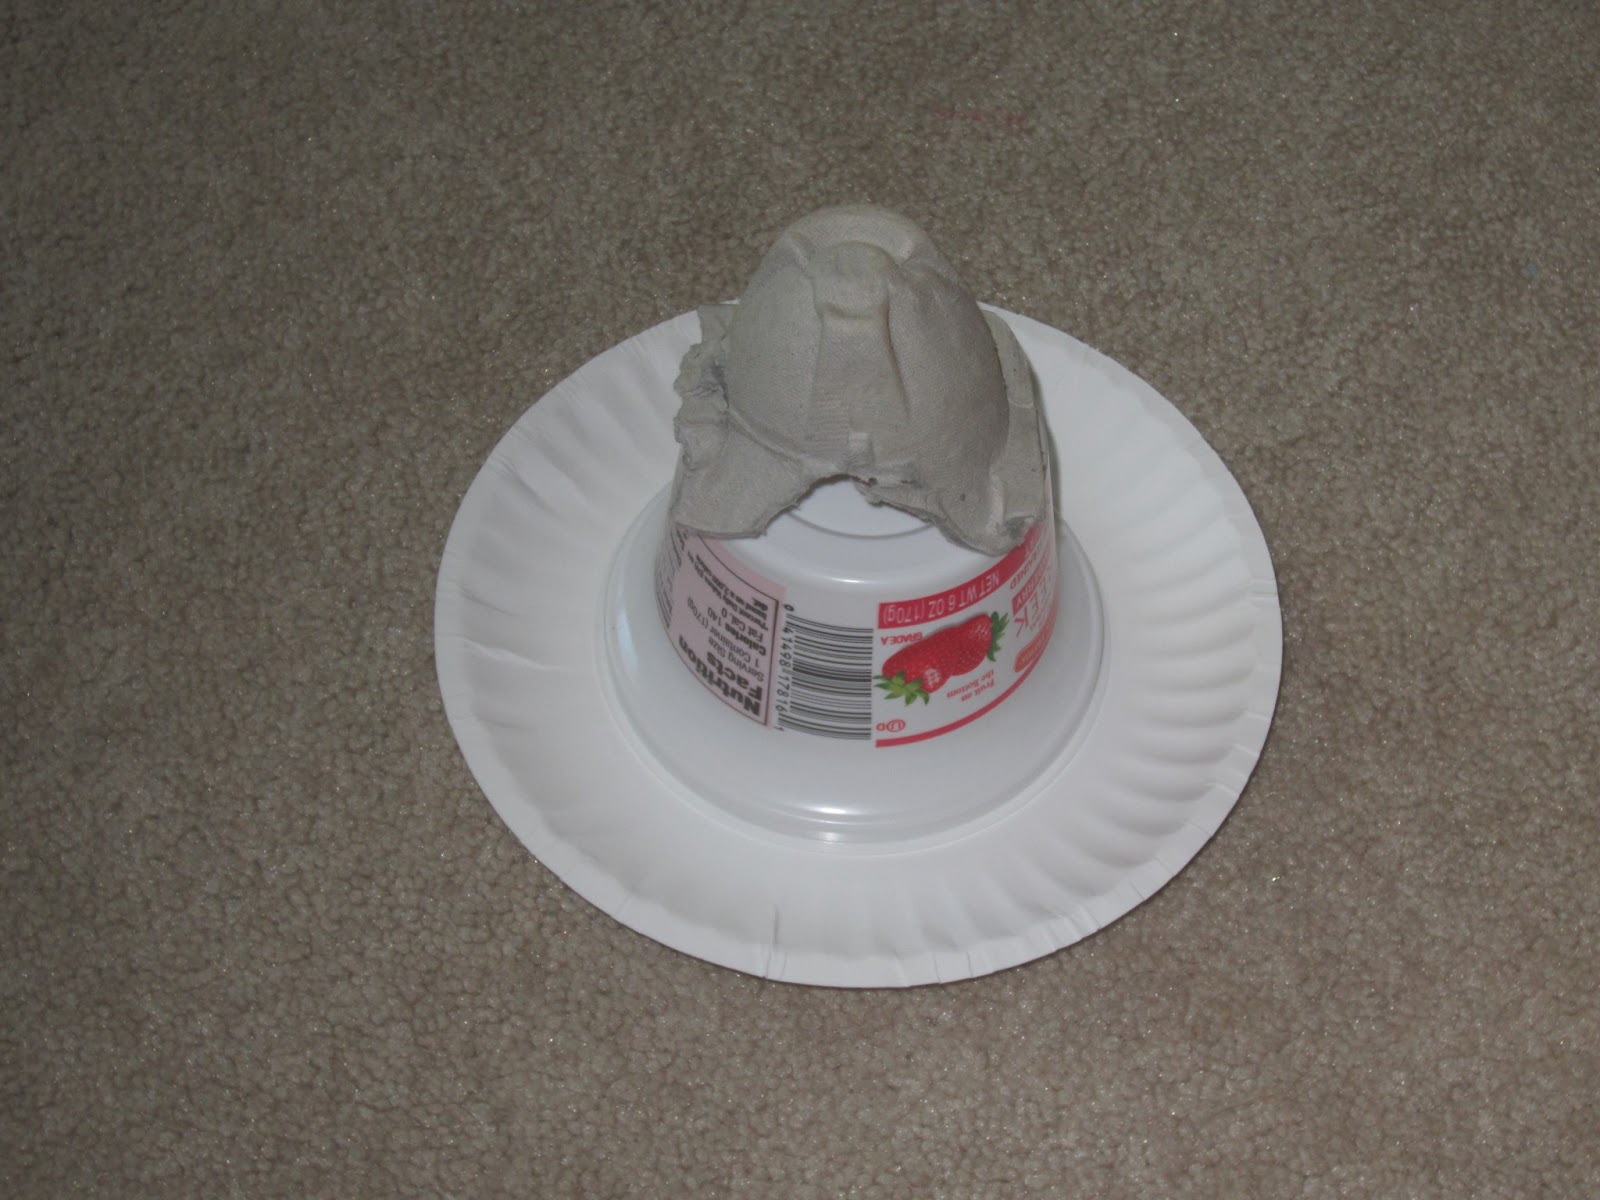
Supplies:  clay, 2 small paper plates, toothpick, yogurt container, egg carton piece (use corner pieces only from the egg carton), newspaper, paper Mache (1/2 flour 1/2 water or more), glue

1.      Begin by gluing the egg carton piece (point up) to the bottom of the yogurt container.


2.      Divide clay into two equal pieces and shape two stone tablets out of each

3.      Using the toothpick, write the numbers 1-5 on one tablet, 6-10 on the other.  Leave to dry overnight. 

4.      Set top of yogurt container on to paper plate. Tear strips of newspaper and dip in paper Mache, cover the entire yogurt container, egg carton piece, and part of paper play.  Work from top down.  Leave to dry overnight or two nights, maybe.


Day 2:
Supplies:  dark gray paint, lighter gray paint, paint brushes, dishes for paint, water to rinse brushes, cardboard circles, felt, markers to trace, scissors, glue, glue gun
1.      Paint mountain dark gray.
2.      Paint clay tablets with light gray paint. 
3.      Cut cardboard circle out (I used a Cool Whip container as a pattern).
4.      Trace cardboard circle onto felt (color of choice and cut out).
5.      Glue felt on to cardboard circle
*At this point you may choose to let the paint dry and finish later or the next day  OR you can be messy, like me (but not as bad as the paper Mache) and just get it done!
6.      Cut out mountain from paper plate and glue to felt.
7.      Glue tablets into standing position against mountain.
 
 
The kids loved it!!  It was messy and fun.  Enjoy!