I had so much fun making this ornament and wanted to share it with all of you. The idea came when I wanted to make a little fun momento for a friend, with her business card, as she is a cake decorator for a cupcake shop.
I began by printing a cupcake graphic off the computer to make my pattern. (I can't draw.) Then I choose the color of felt I wanted for the cupcake 'paper' and cut it out of the felt. I cut two pieces and glued them together so that it would be a bit thicker. I used all scraps of felt I had around the house. Then I choose two different colors for frosting - one for each side and cut those out. Glue the 'paper' shape to the bottom of the frosting, making sure the 'paper' is sandwiched between the two pieces of frosting. Add a ribbon to hang it with and glue it between the frostings.
I then used beads, foam stickers, pom poms, ribbons, and rick rack to decorate the cupcakes. I put her business card on it and framed it with beads.
I thought the rick rack did a great job of giving the cupcake holder look. And the ribbon I had with little lines on it made great sprinkles.
I made this one big enough to hold a business card, but I think it would be fun to make more of these, even in a smaller version, for cute ornaments.
Love It
Welcome to Love It! I'll share a little bit of this and that and everything.........crafts, stories, life, recipies, and whatever else comes to my mind.
Sunday, January 26, 2014
Monday, January 13, 2014
Dryer Vent Collapsible Snowman
I simply cut out some eyes and nose, out of felt. Made a mouth out of some yarn, and tied some fabric or ribbon around it for a scarf. The hat - cardboard and felt with a little gold trim.
I made a solid base to the hat and glued it on. I wish now, I had left some space, because it scrunched a bit in my storage boxes and I can't get it undone. Had, I used less cardboard, and left a hole in the middle to the dryer vent and just did the brim with cardboard, I could have fixed the dent, and the hat could have collapsed inside, as well.
Love It!
Thursday, January 2, 2014
Favorite Handmade Christmas Tree Ornaments Thru the Years
Well, Christmas is over and that means the tree is going to have to come down sooner or later. Though, it seems as if we just put it up. It's always so pretty and each ornament has it's own story and own special meaning. I decided to photograph a few of the handmade ones. Some are old. Some are new. But making Christmas crafts of any kind is one of my favorites. Feel free to try any of them out.
Here are their stories:
A few years ago I bought the traditional glass balls and filled them with colored tinsel, grass, or strips of paper. I had so much fun making them and giving them as gifts. Here are some photos of my favorites.
Blue is my favorite color. I just had to make these when I found
these adorable foam snowflake stickers.
The green plastic canvas cross next to this one is something my Grandmother made several years ago. I think of her every time I put this on my tree.
It was fun choosing color combinations with these foam stickers. Though,
sometimes they come loose and have to be glued back down
And then, there's the opportunity to mix the colors inside the ball for your favorite sports team.
Just simply add letter stickers
Go Panthers!!
Go Cyclones! (for the hubby)
Several years ago, I found this pattern in a magazine. It was cute and simple, so I made several. I've made some big ones. I've also made lots of these little ones to use as table favors at Christmas. Just fill them with a candy cane and then it becomes an ornament, too.
This is probably my all time favorite ornament and it's Christ centered. It was given to me in third grade by my Sunday school teacher. It is such a good reminder of the reason for the season. I've made different versions of this several different years. Though, I always use purchased bows because I can't tie a bow to save my life. (But Jesus did save my life, so that I can live with Him for eternity!) I've made them as gifts for my own Sunday school students, as table favors for Christmas and used it as a craft for Vacation Bible School students.
This is probably my second favorite. I came up with it on my own as a child some time in elementary and made one for my mom for Christmas. I'm not sure if that original one is still in existence, but it may be tucked away in my parents house. Now, I've also seen these examples on Pinterest and have pinned it to one of my boards. It is by far, the most pinned craft on my feed. Anyway, I made another one last year with my daughter because I wanted one for my tree. You just need some straw looking material and I used a baby Jesus from a Christmas card.
I started a tradition with my daughter two Christmases ago of having her make an ornament for Daddy each year as a Christmas present. She already liked using a paint brush, so I just had her paint the sticks, glued them together and framed her picture.
This was last years version. The idea from Pinterest.
We made several and gave them away to others as gifts, as well. Great memories!
This year I ended up buying an ornament to paint (lack of time).
These foam ornaments were made two Christmases ago, as well. It was an early snow day and it put me in the Christmas mood. I decided to make some Christmassy crafts and pulled out odds and ends from the craft drawer to see what we could come up with. My daughter helped. This is my favorite from that day. Buttons as eyes, a bead as a nose and snow flake stickers!
Simply cut your foam shape and decorate any way you wish.
I actually used them as gift tags that could then be hung on the tree.
This was one of my favorite ornaments that I made as a child in school. My favorite crafts of the school year were always the Christmas ornaments, hands down. This was in third grade. I was always disappointed thought that my P didn't turn out like I wanted for putting my initials on it.
I've slowly gotten rid of some of these child hood ornaments as I need to make room for my own children's ornaments now. There are a few, though, that I will always hang on to. I could have taken more pictures, but I think you get the idea.
This was one of my daughter's ornaments that she made at Supper with Santa this year.
Its fun to see her creativity shine on her own.
I don't remember who made this one for sure, but I have an idea. We have several of them so I know they were either Christmas presents or table favors. But I love it!!!!
And last, but not least...this snowman and Christmas tree, along with many crocheted snowflake ornaments. Many were made by my Grandma and maybe some by her mother. I think one of these pictures may be tatted (a lost art form, I believe) rather than crocheted, but I can't tell you for sure. These are some of the things I wish I would have written down or asked again before my mom was not around to tell me. But they are very pretty!
Merry Christmas! Happy New Year!
Love them!!
Wednesday, January 1, 2014
Pineapple Pepper Chicken Spinach Salad
Don't you just love it when an idea pops into your noggin and it works out great!!! I had one of those moments today and I'd love to share it with all of you ~
I was trying to decide what to have for supper. And I wanted to use the new food processor I got for Christmas. We also were in need of groceries in a big way, (other than a few things the hubs picked up on the way home from work one night this week). So, there were few ingredients available from which to choose to chop up. But we did have peppers. My husband suggested spinach salad. We usually eat it with peepers, cheese, cucumber, and whatever else we have on hand, like, mandarin oranges. That used to be one of my favorite meals, but lately it just doesn't hit the spot with me.
We also had some chicken in the freezer, and a few cans of fruit left in the pantry. One of which was pineapple tidbits. A few years ago, I had made a crockpot recipe to go over rice that had chicken and pineapple in it, but I had already made a different type of chicken stir fry earlier this week. Then the idea of simply cooking the chicken in some olive oil, with the pineapple and peepers hit me. And I thought it might be good on top of the spinach. It sounded absolutely delicious and I could almost taste it for the rest of the day before I prepared it.
Finally, it was supper time and I was able to prepare this wonderful concoction. Now, I know there are some other Pineapple Pepper Chicken recipes out there, but all of the ones I've seen have a lot more ingredients and, thus, more work. This was SUPER simple! Also, I've not seen any that have been served on salad, but there may be, unbeknownst to be.
Then the exciting time came where I could taste this lovely dish. I might add it smelled great, too. It was just as wonderful as it sounded and then some. VERY, VERY YUMMY! It is my new favorite. I can't wait for leftovers. I can't wait to make it again. Also, I can eat spinach again. And the best part was it was good even without dressing. There was enough juice in it, that it acted as a nice sweet little dressing in and of itself. Which makes it extra healthy. I did try one of my favorite dressings on it though; and that was, of course, yummy too. I'd also tried a bit of it on rice (leftovers I was feeding the children. Though the three-year old loves spinach, too). That was good, as well.
Okay. Enough talking about it, right? You want to know exactly how I prepared this wonderful dish. Here it is ~
Ingredients:
~about 8 chicken tenderloin strips, thawed
~one large can pineapple tidbits, mostly drained and set aside.
~one orange, red, and yellow pepper, sliced
~olive oil
~pepper
~flour
~Heat olive oil (enough to cover the bottom) in large skillet.
(a friend of mine recently told me the secret to knowing when your oil is hot and this has
been super helpful. If you don't know this trick - read up: heat oil. It is ready when you flick a bit of water off your fingers into the pan of oil and it sizzles. If it doesn't - it's not ready. If it jumps up at you - it's too hot)
~ Add chicken to pan. Sprinkle with pepper. I cooked chicken just a bit on each side before I added the rest of the ingredients.
~Add peppers and pineapple. Cook till done.
~ (optional) I then took a little bit of my pineapple juice and added just a bit of flour to it, making sure there were no lumps. Honestly, I think I started with just enough juice in the bottom of my bowl left from dumping the juice back into the glass that I'd set it aside in after originally pouring too much. Then added a bit of flour, a bit more juice, and a bit more flour, etc. Then I added it to the pan at the end while it was cooking. My thought was it would help thicken it a bit. I didn't leave it on real long, so whether this step is even worth it, I'm not sure. I'm not good with the science of cooking. One could also add more juice to the cooking, but I felt I had enough. Just play with it and do what you like.
~Eat and Enjoy!! Yum Yum!! Super Easy!!!
*Again, when doing things like this, I don't usually measure. Sorry, to those of you who like exact measurements. I used to be that way, too. Now, I'm a sprinkle here add a pinch of this kind of cook. And the exact ounces on my pineapple can, I already threw in my recycling and it's too cold to go the garage to get it :).
LOVE IT!!
Saturday, December 21, 2013
Homeade Ice Cream Toy
Lately, my daughter has been playing Ice Cream Shoppe. A lot! She is constantly asking me, "vanilla or chocolate?" Then, with whatever toys are nearby, she'll serve me my ice cream. That gave me an idea which came from a previous post (10 commandment craft) and some yogurt containers sitting around the kitchen (also used for the 10 commandment craft).
Why not make her a toy with ice cream and bowls? Yes, I could buy a toy similar to this. Yes, it may be easily destroyed in a matter of minutes. However, I could spend some money on a toy like this that would get played with occasionally and then that toy will become another toy. She is getting some other fun things for Christmas, as well. Also, trying to make my idea and be crafty is too fun to pass up.
Here is what I did:
1. Cut 4 pieces of egg carton apart.
2. Mix small amount of 1/2 water and 1/2 flour.
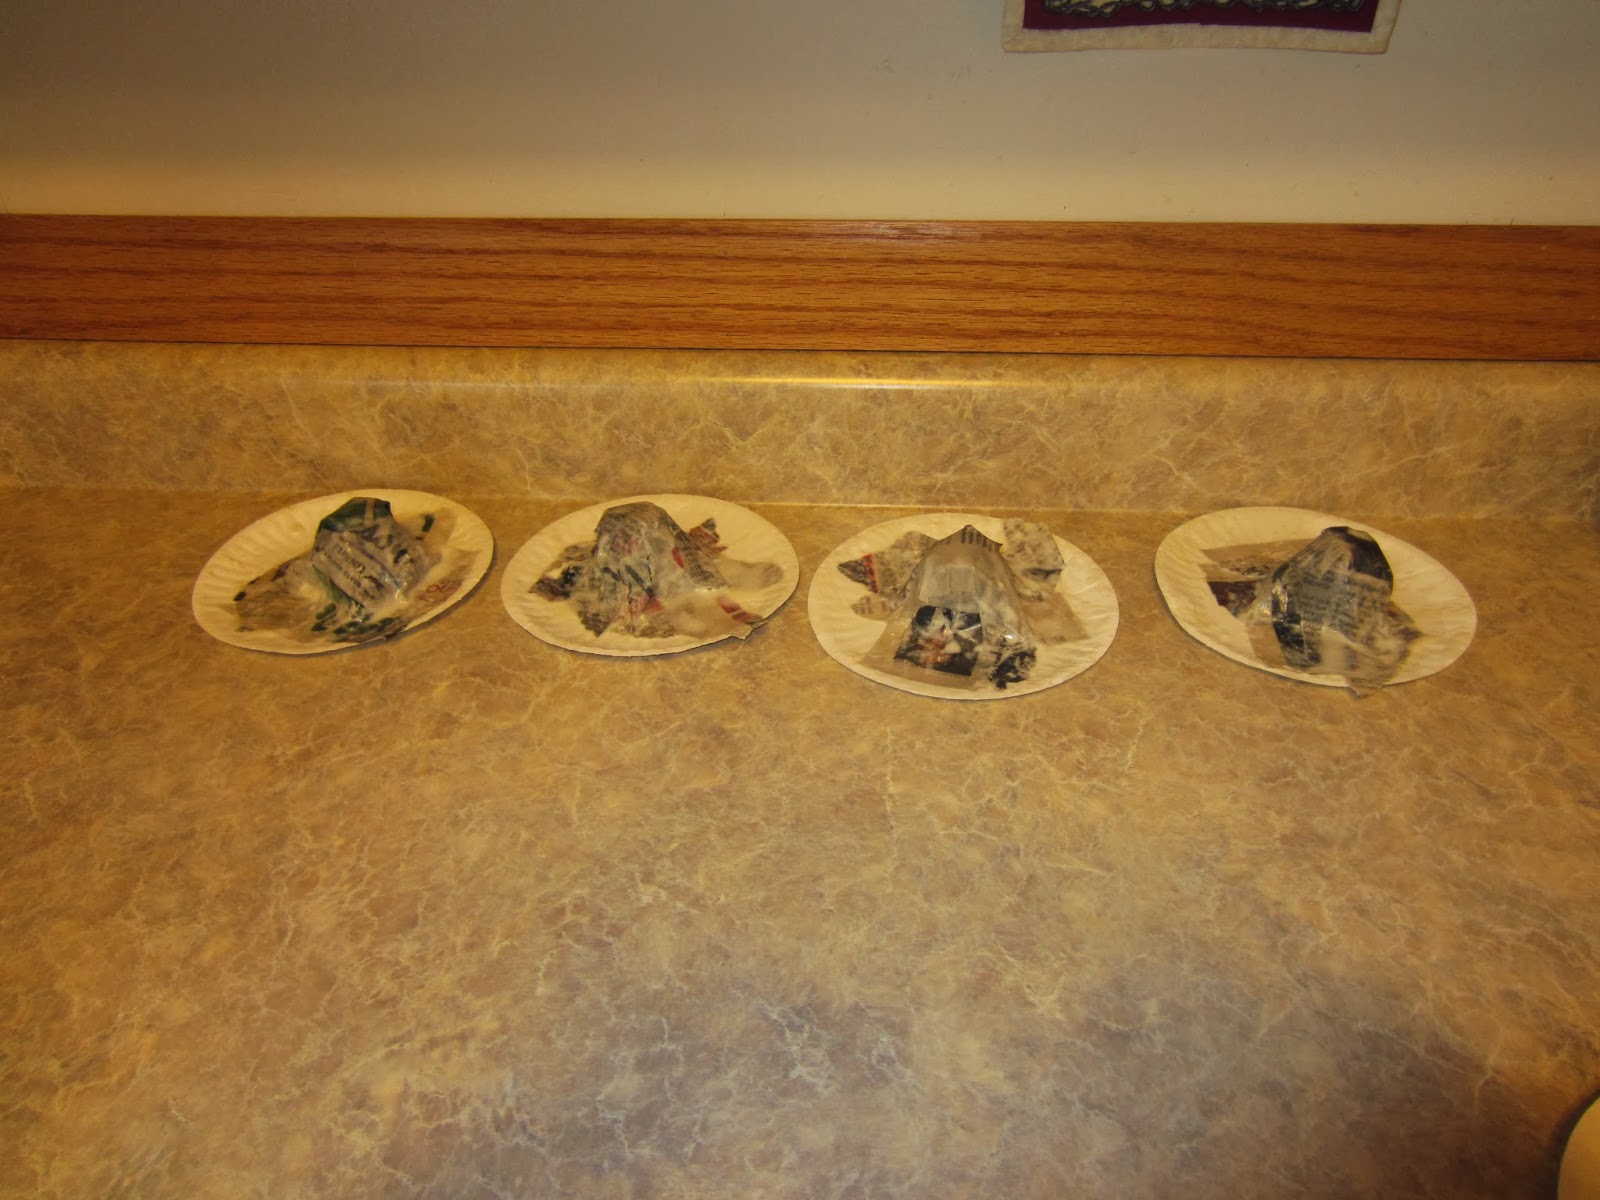
3. Set egg carton (point up), on top of a small paper plate and paper Mache around it. Then let dry.
4. Paint yogurt containers and decorate.
5. Cover paint with a coat of Modpodge. This will help prevent paint from chipping off.
6. Decorate plastic spoons, if desired.
7. Cut around bottom of egg carton till "scoop of ice cream" fits in chosen container. ***Here is where I had trouble. I had to cut it smaller than I intended to fit in the yogurt container. By this time, the paper plate had separated from the egg carton in places. I simply used masking tape to hold the paper plate bottom to the egg carton and paper Mache. Not ideal, but it worked. The only advantage was, the amount of paper plate I had left would have given the scoop of ice cream a melted appearance. One could also use a container with a larger bottom, like a chip dip container. The only other disadvantage was that the egg carton bottom was not as round as you would get with an ice cream scoop, so I could have played around with different egg cartons or materials to make it more round in appearance, but did not. It will still be fun to play with.
8. Paint scoops of ice cream desired color or flavor :). I choose chocolate (brown), strawberry (pink), mint chocolate ship (green and white mixed together or light green paint with spots of brown), and vanilla (I didn't have any color of paint besides white. I wanted to mix a little yellow with the white, but didn't have any. Instead I put just a bit of yellow food coloring with the white paint. It wasn't the best option, but enough that it wasn't bright white.
9. I'm wrapping it up for Christmas in an empty ice cream bucket. Perfect storage container. On my Christmas list is a new ice cream scoop, so if I get it, my daughter can have the old one for play.
10. Have fun, but be sure not to sit on the ice cream. It will melt (squash)!
*This would also have been a super fun craft for my daughter to have helped with and I'm sure many kids would enjoy!!!
Love It!
Why not make her a toy with ice cream and bowls? Yes, I could buy a toy similar to this. Yes, it may be easily destroyed in a matter of minutes. However, I could spend some money on a toy like this that would get played with occasionally and then that toy will become another toy. She is getting some other fun things for Christmas, as well. Also, trying to make my idea and be crafty is too fun to pass up.
Here is what I did:
1. Cut 4 pieces of egg carton apart.
2. Mix small amount of 1/2 water and 1/2 flour.
3. Set egg carton (point up), on top of a small paper plate and paper Mache around it. Then let dry.
4. Paint yogurt containers and decorate.
5. Cover paint with a coat of Modpodge. This will help prevent paint from chipping off.
6. Decorate plastic spoons, if desired.
7. Cut around bottom of egg carton till "scoop of ice cream" fits in chosen container. ***Here is where I had trouble. I had to cut it smaller than I intended to fit in the yogurt container. By this time, the paper plate had separated from the egg carton in places. I simply used masking tape to hold the paper plate bottom to the egg carton and paper Mache. Not ideal, but it worked. The only advantage was, the amount of paper plate I had left would have given the scoop of ice cream a melted appearance. One could also use a container with a larger bottom, like a chip dip container. The only other disadvantage was that the egg carton bottom was not as round as you would get with an ice cream scoop, so I could have played around with different egg cartons or materials to make it more round in appearance, but did not. It will still be fun to play with.
8. Paint scoops of ice cream desired color or flavor :). I choose chocolate (brown), strawberry (pink), mint chocolate ship (green and white mixed together or light green paint with spots of brown), and vanilla (I didn't have any color of paint besides white. I wanted to mix a little yellow with the white, but didn't have any. Instead I put just a bit of yellow food coloring with the white paint. It wasn't the best option, but enough that it wasn't bright white.
9. I'm wrapping it up for Christmas in an empty ice cream bucket. Perfect storage container. On my Christmas list is a new ice cream scoop, so if I get it, my daughter can have the old one for play.
(This picture was before my second coat of paint)
10. Have fun, but be sure not to sit on the ice cream. It will melt (squash)!
*This would also have been a super fun craft for my daughter to have helped with and I'm sure many kids would enjoy!!!
****Updated Note: The kids have loved playing with this. Unfortunately, it didn't stand up as well as I hoped. I thought the ice cream might get smashed, but that is intact. However, the paint chipped off the bowls, despite my efforts to stop this from happening. It was still worth it for the fun they had with it. Had I not left it with the other toys, (which I was planning not too )it may have lasted longer. But, fine while it lasted.
Love It!
Friday, December 20, 2013
Pop-up Christmas Tree Card
As a kid, I loved making Christmas cards or presents for my family members and friends. A tradition I'm trying to pass on to my kids. At the beginning of December, I set up our special "Advent House" with an activity to do each day. One of the activities this year was to make Christmas cards. Well, these turned out to be some pretty fancy cards - especially when made by children ages one and three, with yes, quite a bit of help from mom. Here is how the idea unfolded....
I was busy one day making my own Christmas tree pattern for another craft I was making. I took a piece of white card stock, folded it in half and proceeded to draw one half of the tree. I ended up making a few different patterns until I got one exactly how I wanted it. By this time, I had a few trees out of card stock lying around and held them all together in one hand.
Hmmm, I got to thinking. If I glued half of each one together, they would stand up and make a very cute 3-D Christmas tree!
Lets see....that could make a very nice Christmas card! White card stock? Hmmmm. Looks like snow. All we need is some green and we'll have nice snow topped Christmas trees.
Here is how we started:
1. Lay out white card stock and brush strokes of green across the paper. You will need four pieces of paper four each tree. Let dry. (The kids did this part.)
2. Fold each paper in half, hot dog style, so the green is to the inside.
3. Draw or Trace your Christmas tree onto the paper. You can choose to trace the entire tree or just trace half of the tree onto your folded paper and cut both sides at one time.
4. After each tree is cut out, begin by folding 1/2 of one tree to 1/2 of the other tree. Then continue to add the rest of the tree shapes the same way.
5. Lastly, I gave the oldest stickers and let her have a blast decorating the trees. We used ornament stickers, snowmen, and snowflakes.
We wrote a Christmas message on some of the "white space" and then folded the tree back up together and put it in a regular business envelope. It is quite thick though, if it is done this way - all braches together on one side. It would work better to have a bigger envelope and just lay the tree flat. Or, they can simply be decoration around the house, not a card.
Merry Christmas!
Love It!
I was busy one day making my own Christmas tree pattern for another craft I was making. I took a piece of white card stock, folded it in half and proceeded to draw one half of the tree. I ended up making a few different patterns until I got one exactly how I wanted it. By this time, I had a few trees out of card stock lying around and held them all together in one hand.
Hmmm, I got to thinking. If I glued half of each one together, they would stand up and make a very cute 3-D Christmas tree!
Lets see....that could make a very nice Christmas card! White card stock? Hmmmm. Looks like snow. All we need is some green and we'll have nice snow topped Christmas trees.
Here is how we started:
1. Lay out white card stock and brush strokes of green across the paper. You will need four pieces of paper four each tree. Let dry. (The kids did this part.)
2. Fold each paper in half, hot dog style, so the green is to the inside.
3. Draw or Trace your Christmas tree onto the paper. You can choose to trace the entire tree or just trace half of the tree onto your folded paper and cut both sides at one time.
4. After each tree is cut out, begin by folding 1/2 of one tree to 1/2 of the other tree. Then continue to add the rest of the tree shapes the same way.
5. Lastly, I gave the oldest stickers and let her have a blast decorating the trees. We used ornament stickers, snowmen, and snowflakes.
We wrote a Christmas message on some of the "white space" and then folded the tree back up together and put it in a regular business envelope. It is quite thick though, if it is done this way - all braches together on one side. It would work better to have a bigger envelope and just lay the tree flat. Or, they can simply be decoration around the house, not a card.
Merry Christmas!
Love It!
Quick Gift Card Holder
Do you like to give gift cards for Christmas or birthdays, etc? Do you like to find fun ways of wrapping them up, but don't like spending your money on gift card holders? I usually wrap them in a small box, at the very least. But sometimes, I miss the "gift" when giving a gift card.
While wrapping some presents today, a quick simple "Gift Card Holder" popped into my head. I don't think there has ever been a year that my dad has not gotten peanuts for Christmas. I was going to put his gift card in the box with his peanuts. Then I decided the gift card would look cute under the plastic lid of the peanut can.
I simply took off the "To/From" piece off the gift card, though not all gift cards come with that. Then put it under the lid and snapped it back on.
While wrapping some presents today, a quick simple "Gift Card Holder" popped into my head. I don't think there has ever been a year that my dad has not gotten peanuts for Christmas. I was going to put his gift card in the box with his peanuts. Then I decided the gift card would look cute under the plastic lid of the peanut can.
I simply took off the "To/From" piece off the gift card, though not all gift cards come with that. Then put it under the lid and snapped it back on.
Then wrap your present and there you have it - a quick gift card holder with a little fun gift. Now, will the recipient notice the gift card right away or simply eye the peanuts? It mas a fun extra surprise!
Thursday, December 5, 2013
Allergy Awareness
I never expected to have a child with a food allergy. I don't have any food allergies and my husband doesn't have any. And yet, we have a child with a food allergy. For whatever reason, food allergies are becoming more and more common. I have two friends who have children with food allergies, as well.
Our particular allergy is peanuts and tree nuts. Our daughters worst reaction has been to pecans.
We now carry an Epipen with us. Thankfully, our daughters case has not been severe. We are able to continue to eat peanut and nut products in our home. We just make sure everything she has is peanut and nut free. However, there are cases where even being in the same room as the allergen or touching the residue can cause a severe reaction.
So, let's face it, this creates a certain amount of anxiety when eating outside of the home. When going to a restaurant, we have to ask about nuts. Potluck or family gatherings can even be more anxiety provoking. It's sometimes hard to tell what may or may not contain peanuts, tree nuts or peanut butter. Sometimes it's obvious; other times it is not. And it's not limited to desserts.
At a small gathering, it's easy to ask others if a food item contains the given allergen. At a big gathering, it is not. At times its necessary to take your own food to prevent the exposure. I also must give constant reminders to caregivers that she has the allergy.
I for one, am glad that more schools are taking precautions for children with allergies. It gives me more peace as a parent when my child is out of my sight. Take my word for it, a reaction is scary.
But what about simple gatherings, like church for instance, might it not be a bad idea to simply share this awareness? For me as a parent, it would give me a little more peace of mind.
Now, I'm not talking about doing anything drastic like telling everyone to stop bringing things with nuts or peanut butter or anything. Completely avoiding all the allergens out there would be impossible. I know some people with more severe allergies may not be able to be around the specific allergen at all, but those situations would need to be dealt with on an individual basis. I know those parents would take extreme precautions. I would too if that were our case.
Now, I know I've only been talking about peanuts and tree nuts. But say the allergy were eggs or dairy. These are two more very common ingredients found in the kitchen. I could also bring up celiac disease, where people are unable to tolerate gluten found in wheat products. I'm only touching the tip of the iceberg here on possible allergens, albeit they are some of the most common. This is why I say it's impossible to avoid all allergens.
But what I'm most interested in accomplishing and what I'm talking about is awareness. The first of these is making others aware that these allergies exist. The second, is simply placing the recipe with the food item you are taking to make the consumer aware of what is in it. There are simple ways in which this could be done. For example, just list the ingredients you included on an index card or tape your recipe card to a craft stick or toothpick and place in the food; or simply lay the recipe next to the dish. I know some places divvy up desserts and such on too plates for each individual to take. This is fine too. Just leave one plate with the recipe attached with a stick near the food item This will allow people to view the recipe and know what they can take. And hey, and if someone asks you for the recipe - you've got it ready to share with them!
Our particular allergy is peanuts and tree nuts. Our daughters worst reaction has been to pecans.
We now carry an Epipen with us. Thankfully, our daughters case has not been severe. We are able to continue to eat peanut and nut products in our home. We just make sure everything she has is peanut and nut free. However, there are cases where even being in the same room as the allergen or touching the residue can cause a severe reaction.
So, let's face it, this creates a certain amount of anxiety when eating outside of the home. When going to a restaurant, we have to ask about nuts. Potluck or family gatherings can even be more anxiety provoking. It's sometimes hard to tell what may or may not contain peanuts, tree nuts or peanut butter. Sometimes it's obvious; other times it is not. And it's not limited to desserts.
At a small gathering, it's easy to ask others if a food item contains the given allergen. At a big gathering, it is not. At times its necessary to take your own food to prevent the exposure. I also must give constant reminders to caregivers that she has the allergy.
I for one, am glad that more schools are taking precautions for children with allergies. It gives me more peace as a parent when my child is out of my sight. Take my word for it, a reaction is scary.
But what about simple gatherings, like church for instance, might it not be a bad idea to simply share this awareness? For me as a parent, it would give me a little more peace of mind.
Now, I'm not talking about doing anything drastic like telling everyone to stop bringing things with nuts or peanut butter or anything. Completely avoiding all the allergens out there would be impossible. I know some people with more severe allergies may not be able to be around the specific allergen at all, but those situations would need to be dealt with on an individual basis. I know those parents would take extreme precautions. I would too if that were our case.
Now, I know I've only been talking about peanuts and tree nuts. But say the allergy were eggs or dairy. These are two more very common ingredients found in the kitchen. I could also bring up celiac disease, where people are unable to tolerate gluten found in wheat products. I'm only touching the tip of the iceberg here on possible allergens, albeit they are some of the most common. This is why I say it's impossible to avoid all allergens.
But what I'm most interested in accomplishing and what I'm talking about is awareness. The first of these is making others aware that these allergies exist. The second, is simply placing the recipe with the food item you are taking to make the consumer aware of what is in it. There are simple ways in which this could be done. For example, just list the ingredients you included on an index card or tape your recipe card to a craft stick or toothpick and place in the food; or simply lay the recipe next to the dish. I know some places divvy up desserts and such on too plates for each individual to take. This is fine too. Just leave one plate with the recipe attached with a stick near the food item This will allow people to view the recipe and know what they can take. And hey, and if someone asks you for the recipe - you've got it ready to share with them!
Here is my example of a dessert I made recently to take to church to share. I've included the ingredients. In this particular dessert, I did not add the nuts - you know why (yet my recipe card has it listed for my example). If I saw this recipe attached to a food item, I would know to have my daughter avoid it.
So, simply please be aware of those with allergies. I'm not asking you to avoid making things with nuts or peanut butter. Hey, it gives me a chance to enjoy these things. Currently I avoid making desserts or foods with nuts or peanut butter so that I do not have to withhold them from my child. She loves cookies and you have no idea how badly I want to make (and eat) peanut butter cookies. But, until she's older at least, and understands the situation more - I won't. I will occasionally make a peanut butter sandwich, but other food - no. For one, I don't want to make two meals.
So, the next time you take a dish or dessert to share, please consider including the recipe for allergy awareness. I and other mothers with children who have allergies, thank you.
** update - I learned something new from a friend on allergies. She has a child allergic to egg. He can not have the spray used to spray pans for baking. Another thing I'm sure we all use often. Something else to be aware of and how hidden then allergen can be.
Wednesday, December 4, 2013
Cute Christmas Cookie Walk Sign
The Advent season is upon us; and with that comes lots of Christmas preparations. One of these is lots of baking. Some of the most made items during the holidays are cookies and candies. Where can you find a bunch of these goodies at one time? A cookie walk, of course.
I've been working with a wonderful group of people to help plan a cookie walk fundraiser for our church. It's coming up in a week and a half. The other night, during one of my sleepless hours, an idea popped into my head. I had just acquired some boxes over the weekend, and rather than recycle them, I kept them thinking they'd come in handy. Well, they didn't even get a chance to collect any dust on my shelving.
Well, since cookies have been consuming my mind, I suddenly pictured a gingerbread man. Hmmm. Cardboard boxes would be the perfect color of a gingerbread man. Hmmm. Wouldn't that make a cute sign to place out in front of the church? Cute, attractive, and sure to be an attention grabber. Thus, my gingerbread men sign was born.
I've been working with a wonderful group of people to help plan a cookie walk fundraiser for our church. It's coming up in a week and a half. The other night, during one of my sleepless hours, an idea popped into my head. I had just acquired some boxes over the weekend, and rather than recycle them, I kept them thinking they'd come in handy. Well, they didn't even get a chance to collect any dust on my shelving.
Well, since cookies have been consuming my mind, I suddenly pictured a gingerbread man. Hmmm. Cardboard boxes would be the perfect color of a gingerbread man. Hmmm. Wouldn't that make a cute sign to place out in front of the church? Cute, attractive, and sure to be an attention grabber. Thus, my gingerbread men sign was born.
I decided to make a total of three gingerbread men, with each one holding a sign - so all together it announces: "Cookie Walk Today". I put much more time into it then planned. Why? I was having way too much fun. I drew faces, made some cute squiggly lines with yarn and some with glitter glue. I added some buttons and a bow tie, and even some strips of fabric for scarves.
I even covered them with contact paper on the front, folded the contact paper over to the back, and then secured the entire back with packaging tape. Why? Just in case of rain. The next step will be to tape them to metal garden stakes and put them up when cookie day comes.
If I remember to take the camera, maybe I'll add another picture for ya!
And please, also remember the reason for the season: the tiny babe, God's Son, born in a manger to grow up to live a perfect life and die on a cross for the sins of all, and rise again to give us the gift of eternal life. Prepare your hearts and minds for Jesus' second coming.
Blessings to you during this season!
Friday, October 25, 2013
Recycled Party Hat
So, this weekend I have a baby turning one! I don't know where this last year went, but we are of course having a party. Hmmm. A party? I don't have any party hats. Well, not except for some Winnie the Pooh Ones that I'm already planning on using for a theme next year (courtesy of a garage sale find), and Princess hats left over from my daughters birthday. Can't use princess for a boy and not going to use Pooh. I just want one picture with a hat on his head since it's his first birthday. And I've made all the other decorations, so it doesn't make sense to go shopping for some Dino décor, just for a silly hat.
That's It! I'll just recycle one of the old princess hats!
Well, there was no way I was going to come up with a cone shape to cover up the old hat. And I still wanted the shape from the previously purchased hat. I didn't have time to start something from scratch. So, I just started ripping pieces of paper (I used three different colors), grabbed a glue stick, and stuck them on. Then, I cut out my dinosaur and glued it to the front of the hat. And, there we have it: a quick, inexpensive hat for the birthday boy!
That's It! I'll just recycle one of the old princess hats!
Well, there was no way I was going to come up with a cone shape to cover up the old hat. And I still wanted the shape from the previously purchased hat. I didn't have time to start something from scratch. So, I just started ripping pieces of paper (I used three different colors), grabbed a glue stick, and stuck them on. Then, I cut out my dinosaur and glued it to the front of the hat. And, there we have it: a quick, inexpensive hat for the birthday boy!
Love It!
Thursday, October 3, 2013
Toilet Paper Roll Cord Keepers
Imagine your decorating for Christmas. The lights you hang won't quite reach to the nearest outlet. You head to the box where you store extension cords, only to discover they are all tangled or knotted together. After a few minutes of untangling them, you finally get it free. Are you tired of these tangled cords? My mom got tired of this problem a long time ago. We came up with a solution that became one of my favorite childhood crafts. Just yesterday, I shared this craft with my daughter for the first time.
What You Need:
-empty toilet paper role, paper towel roll, or other cardboard tube
-crayons, markers, or paint
Instructions:
**Decorate any way you would like and HAVE FUN!
Pssst - Parents beware: As a kid, I would sell these to my mom for money.
Now, fold extension cord in half a couple times (the number of times you can do this depends on how heavy duty your cord is). Then stick the ends through the toilet paper roll and throw it in a box. And Ta Da: They're ORGANIZED! No more knots!
Love It!
Subscribe to:
Posts (Atom)